How to Publish Your Book on Amazon KDP: A Click-by-Click Guide for First Time Authors From My Experience
You've written your book. It's done. The hard part is behind you.
Now you're staring at Kindle Direct Publishing wondering which button to press first, and half the "guides" online want to explain what KDP is before they tell you what to do. You don't need that. You need someone sitting next to you saying "click this, then this, and don't panic when that message pops up."
That's what this is.
I'll walk you through the entire process the way I'd walk a friend through it: what to click, why it matters, what happens next, and the mistakes beginners make that are easy to avoid once someone warns you. By the end, you'll have a live book on Amazon without opening another tab.
Let's publish.
Who this guide is for?
This is for you if:
- You've finished writing (or you have a final manuscript and cover ready to go).
- You want to publish a Kindle eBook, a paperback, a hardcover, or all three.
- You've never touched the KDP dashboard, or you tried once and got overwhelmed.
You don't need a publisher, an agent, or a single dollar upfront. KDP is free to use. Amazon only takes a cut when your book actually sells.
What you'll accomplish?
By the last section, you'll have:
- A KDP account with your tax and banking set up correctly.
- A book uploaded, previewed, and error-free.
- Categories and keywords chosen so real readers can find you.
- Pricing and royalties set the way you want them.
- A published book, plus a clear plan for what to do after it goes live.
Things you'll need before you start
Have these ready so you're not scrambling mid-upload:
- Your manuscript, a clean, final file (DOCX is perfect for eBooks; a print-ready PDF for paperback/hardcover interiors).
- Your cover, either a finished cover file, or you'll build one inside KDP's free Cover Creator.
- A book title and description, you can polish the description later, but have a draft.
- Your tax ID, for the Tax Interview (in the US, that's your SSN or EIN; other countries have equivalents).
- Bank details, for royalty deposits.
Do a final read of your manuscript before you upload. Fixing a typo after publishing is easy, but every re-upload triggers another review cycle. Get it as clean as you reasonably can now, and save your future self the wait.
Step 1: Create your Amazon KDP account
- Go to kdp.amazon.com and sign in.
- Here's the first thing beginners get wrong: they create a brand-new account. You don't have to. If you already shop on Amazon, you can sign in with that same account. It works perfectly fine and keeps everything in one place.
- Once you're in, Amazon will ask you to agree to the KDP Terms and Conditions. Read them or skim them, tick the box, and you're inside the dashboard.
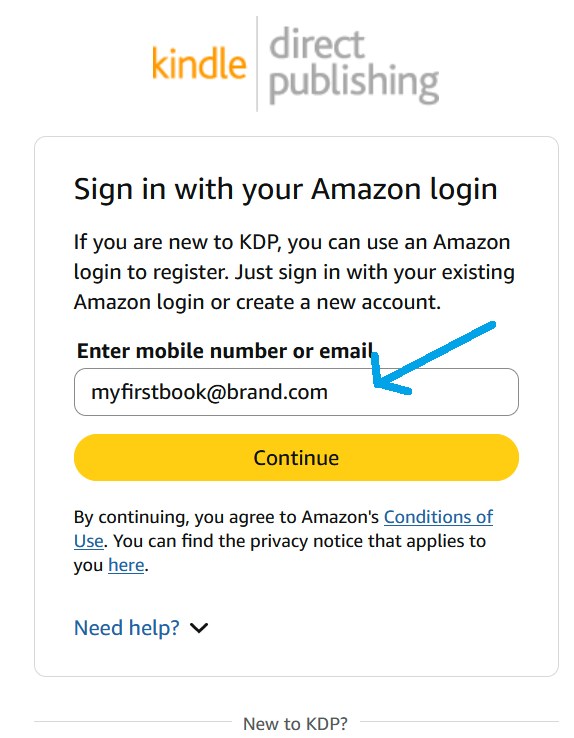
You'll land on a mostly empty page. That's normal, it's empty because you haven't published anything yet. Before you create your first book, Amazon needs two things from you: your tax information and your payment information. Handle those now so nothing blocks your royalties later.
Step 2: Complete the Tax Interview
- Click your account name in the top corner, then go to your account settings. You'll see a section for tax information with a button to start the Tax Interview.
- This part intimidates people more than it should. It's a short guided questionnaire, not a real interview. Amazon asks whether you're an individual or a business, what country you're in, and your tax identification number. It fills out the correct tax forms for you in the background.
- In the US: you'll typically use your Social Security Number (as an individual) or an EIN (if you've set up a business).
- Outside the US: you'll usually be asked for a foreign tax ID, and the interview may ask about a tax treaty between your country and the US. If your country has a treaty, providing your local tax ID often reduces or eliminates US tax withholding on your royalties.
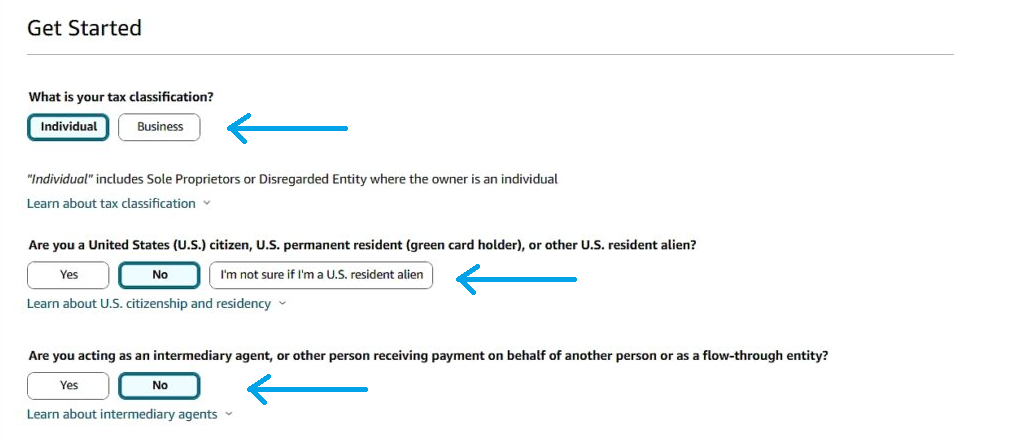
Answer honestly and the system calculates the right rate.
Skipping the Tax Interview and trying to publish anyway. Amazon can hold your royalties until this is complete. Do it first, get it out of the way, and you'll never think about it again.
When you finish, you'll see a confirmation that your tax information is submitted. That's all you need.
Step 3: Add your payment information
In the same settings area, find the section for bank account / payment information and enter where you want your royalties deposited.
Amazon pays by direct deposit (electronic funds transfer) in most countries. Enter your account and routing details carefully, a single wrong digit is the most common reason a payment fails.
Amazon pays royalties roughly 60 days after the end of the month a sale happened. So a sale in March is paid out around the end of May. This isn't a delay in your setup, it's just how the payment cycle works. Don't expect money the day after your first sale.
Each Amazon marketplace (US, UK, Germany, and so on) pays in its own currency and has its own minimum payout threshold. If you sell a couple of copies in a small marketplace, that money simply rolls over until it crosses the threshold.
Step 4: Open your KDP Bookshelf and create a new title
The Bookshelf is your home base. Every book you publish lives here, and you'll come back to it constantly to check status, edit details, and change pricing.
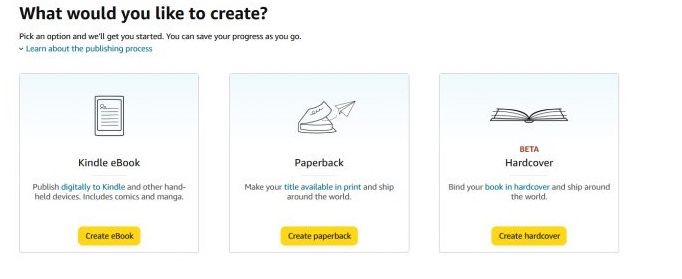
At the top you'll see three buttons to start a new book:
- + Kindle eBook
- + Paperback
- + Hardcover
This is your first real decision. Here's how I think about it:
| Kindle eBook | Almost every book. Cheapest to produce (no printing), fastest to publish, reaches the biggest audience. | Uses a reflowable file. No printing cost, so your royalty math is simpler. |
| Paperback | Readers who want a physical copy; also great for gifting and author credibility. | Printed on demand, no inventory, no upfront cost. |
| Hardcover | Non-fiction, memoir, gift books, children's books, and anyone wanting a premium, authoritative feel. | Higher print cost, slightly longer review time. Case-laminate only (no dust jacket). |
Start with the Kindle eBook, then add the Paperback, then decide on hardcover. Each format is a separate entry on your Bookshelf, but they link together on the same Amazon listing so readers see all your editions in one place. You don't have to do them all at once, publish the eBook today and come back for print tomorrow if you want.
For this walkthrough, click + Kindle eBook first. The paperback and hardcover setups are nearly identical, and I'll flag the print-only steps as we go.
Step 5: Fill in your Book Details
This is the first of a few pages. You'll probably spend the most time here, and that's fine, this is your book's identity and how readers find it.
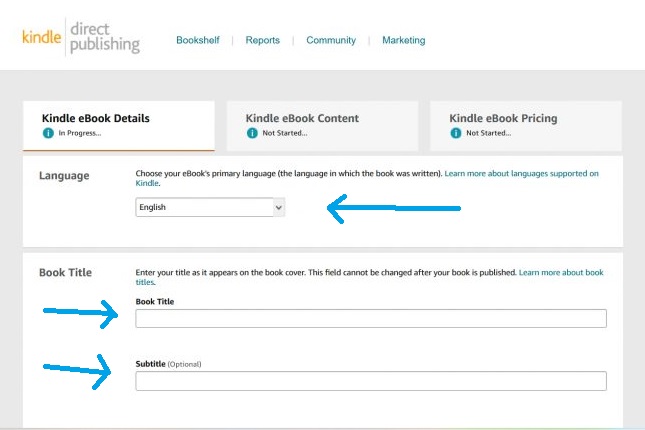
Language
Choose the language your book is written in. This affects which marketplace and reader base your book is matched to, so get it right.
Book Title
Enter your title exactly as it should appear on the cover and the listing.
Amazon is strict here: the title in this box must match your cover. Don't stuff keywords into the title (like "Learn Python Fast Beginner Guide 2026 Coding Bootcamp"). Amazon can flag or block that, and it looks amateur to readers.
Subtitle
Optional, but useful, especially for non-fiction. This is where a natural keyword-rich phrase belongs. "A 30-Day Plan for Anxious Beginners" tells readers exactly what they're getting.
Your title and subtitle become part of your book's identity and are very hard to change cleanly after publishing. Get them right now. Read them out loud. Ask someone. This is not the field to rush.
Series
If your book is part of a series, add the series name and number here. This groups your books together on Amazon and is a real sales driver, readers who finish book one can find book two instantly. Leave it blank for a standalone.
Edition Number
Optional. Only fill this if you're publishing a second or later edition of an existing book (say you heavily revised it). First-timers leave this blank.
Author
Enter your name as you want it to appear. This is where you decide on a pen name.
You can absolutely publish under a pen name, millions of authors do. Type the pen name in the author field. Your real legal name still goes in the Tax Interview (Amazon needs that to pay you), but readers only ever see the pen name. Just remember: once your book is live, changing the author name is awkward, so pick your pen name before you publish, not after.
Contributors
Add anyone else involved, a co-author, illustrator, editor, translator, or foreword writer, with their role. Skip this if it's just you.
Description
This is your book's sales pitch, the text readers see under "About this item." Write it to sell, not to summarize. Open with a hook, promise a benefit or a feeling, and end with a reason to buy now.
You get around 4,000 characters. You can use basic formatting (bold, line breaks, small headers), KDP has a simple formatting toolbar, or you can add light HTML if you're comfortable. Short paragraphs and a bit of white space read far better than one dense block.
Draft your description in a separate document first, then paste it in. You'll rewrite it a few times, and you don't want to do that inside a cramped web box. And yes, you can edit the description anytime after publishing with no penalty, so don't let it hold up your launch.
Publishing Rights
You'll see two options:
- I own the copyright and I hold the necessary publishing rights. ← This is you if you wrote the book.
- This is a public domain work.
Choose the first one unless you're republishing something genuinely in the public domain (like an old classic whose copyright expired). Choosing public domain when it isn't, or vice versa, causes problems, so pick honestly.
Primary Marketplace
This is the main Amazon store your book is associated with (Amazon.com, Amazon.co.uk, etc.). Pick the one where most of your readers are. It doesn't limit where your book sells, it's just the default home base. Most authors choose Amazon.com.
Categories
Click to choose your categories (Amazon lets you select up to three). This is how your book appears in "Best Sellers in [Category]" lists.
Here's the insider move: go specific, not broad. A tiny, well-matched category is far easier to rank in than a giant one. Being the 1 new release in a focused sub-category gets you an orange bestseller badge, and that badge sells books. Browse Amazon and look at what category successful books like yours sit in, then match them.
Keywords
You get seven keyword slots. These aren't hashtags, they're the search phrases readers actually type into Amazon.
Think like a buyer. If your book is a cozy mystery set in a bakery, real search phrases might be "cozy mystery series", "small town amateur sleuth", "baking mystery novel". Use natural phrases, not single words, and don't repeat words already in your title (Amazon already indexes those).
Don't overthink your first keywords. After 30-60 days, KDP's reports show you which search terms are actually bringing in sales. You can update all seven keywords anytime. Launch with your best guesses, then refine with real data.
Age Range (if applicable)
Only appears for children's books. Set the reading age and grade range so parents filtering by age can find you. Skip it if it's not a kids' book.
Click Save and Continue at the bottom to move to the next page.
Step 6: Upload your Manuscript
Now for the moment that makes everyone nervous: uploading the actual book. Take a breath, it's more forgiving than you think.
Supported formats
| DOCX / DOC | Great | Works (KDP converts it) | Easiest starting point for most authors. |
| EPUB | Preferred by many | — | Best if you formatted with dedicated software; more predictable results. |
| Accepted | Required for print | For print, a print-ready PDF gives you the most control over layout. | |
| KPF (Kindle Create) | Supported | — | Amazon's free formatting tool; nice for styled eBooks. |
For an eBook, a clean DOCX is genuinely fine to start. KDP converts it into the Kindle format automatically. If you want more polish, run it through the free Kindle Create tool first and upload the resulting file.
For a paperback or hardcover interior, upload a PDF whenever you can. Print is exact, what's in the PDF is what gets printed, so a print-ready PDF with embedded fonts avoids surprises.
Formatting tips that prevent 90% of problems
- Embed your fonts before uploading a print file. Un-embedded fonts are the 1 cause of print rejections.
- Use a proper heading style for chapter titles and insert real page breaks between chapters, don't just press Enter twenty times.
- Insert a linked table of contents for eBooks (Kindle readers rely on it to navigate).
- Images at 300 DPI minimum. Low-resolution images look fine on your screen and blurry in print.
- For print with edge-to-edge images, you'll deal with bleed, more on that in the print settings section.
Common upload errors (and why they're not scary)
When you upload, KDP runs an automatic check and may show warnings. This part confuses first-timers because a yellow warning looks alarming. It usually isn't.
- "Errors" (red) must be fixed, like a font that won't embed or a corrupted image. Fix and re-upload.
- "Warnings" (yellow) are advisory, things like "a hyperlink points to an external site." Often completely fine. Read them, decide, and move on.
Don't worry if a warning appears. Read what it actually says. Most of the time you'll click through it without changing a thing.
Panicking at the first yellow warning and re-uploading five times. Slow down, read the message, and only act on real errors. The previewer (next step) is where you'll truly confirm everything looks right.
Step 7: Upload your Book Cover
You have two paths here, and both are valid.
Option A: Cover Creator (KDP's free built-in tool)
If you don't have a designer or a finished cover, use Cover Creator. It's a free, in-browser tool: pick a layout, add your title and author name, choose from stock images or upload your own, and it assembles a proper cover for you. It accepts JPG, PNG, and GIF images.
Cover Creator is genuinely good for low-content books, simple non-fiction, and quick utility titles. It's more limited for commercial fiction where the cover has to compete visually, the layouts and fonts are basic.
Option B: Upload your own cover
If you have (or commissioned) a finished cover, upload it here.
- eBook cover: aim for 1,600 × 2,560 pixels (a 1.6:1 height-to-width ratio), saved as JPG. Amazon flags smaller images as low quality in the store, so hit that size.
- Print cover (paperback/hardcover): this is a full-wrap cover, back cover + spine + front cover as one single PDF. The spine width depends on your page count and paper type, so you can't just guess the dimensions.
For print covers, use KDP's cover template generator. You enter your trim size, page count, and paper type, and it gives you a template with the exact spine width and bleed lines already drawn. Design inside those lines and your cover fits perfectly the first time. Trying to calculate spine width by hand is how covers come back rejected.
| Cost | Free | Free (if you make it) or paid designer |
| Best for | Low-content books, simple non-fiction, quick launches | Fiction, competitive genres, anything needing to stand out |
| Control | Limited layouts and fonts | Total control |
| My recommendation | Fine to start and iterate | Worth it if your cover has to sell against strong competition |
Remember: your cover is the single biggest factor in whether someone clicks your book. In a sea of thumbnails, it's doing the heavy lifting. Give it real attention even if the rest of the process feels more urgent.
Step 8: Preview your book before you trust it
Do not skip this. I mean it.
Click Launch Previewer. KDP renders your actual book, interior pages, and for print, your full cover wrapped over the pages with trim and bleed guides drawn on top. This is the single best defense against publishing something broken.
What to check
- eBook: flip through chapters. Do headings look right? Does the table of contents jump to the correct places? Are images centered and sharp? Does anything look squished on a small screen?
- Print: scrub every page. Is any text too close to the spine (the "gutter")? Is the spine text centered? Is the barcode area on the back clear? Are images bleeding off the edge cleanly with no white slivers?
Common formatting issues and how to fix them
- Text jammed into the spine → increase your inside (gutter) margin and re-upload.
- Blurry images → replace with 300 DPI versions.
- White border around a full-page image → your file needs bleed; expand the page size and re-export.
- Blank pages in odd spots → usually stray page breaks in your source document.
- eBook table of contents doesn't jump → your TOC links aren't set as real hyperlinks; rebuild it in your source file.
Fixing means going back to your original document, correcting it, and re-uploading. Mildly annoying, absolutely worth it. A book with broken formatting gets refunds and one-star reviews, the previewer is where you prevent that for free.
When everything looks right, click Approve (or close the previewer), then Save and Continue.
Step 9: The ISBN, free or your own?
For a Kindle eBook, you don't need an ISBN at all. Amazon assigns your eBook an ASIN (Amazon Standard Identification Number) automatically. Nothing to do here, move on.
For paperback and hardcover, you need an ISBN, and KDP gives you a choice:
| Cost | Free | ~$125 for one, or $295 for a 10-pack (US) |
| Publisher of record | Listed as "Independently published" | Your own imprint / publishing name |
| Use beyond Amazon | Tied to KDP | Portable, use the same ISBN with other printers/distributors |
| Best for | A single title, first-time authors, low-content books | Building a publishing brand, planning 3+ books, going wide later |
If this is your first book and you just want it live on Amazon, take the free KDP ISBN. It costs nothing and works fine. If you're planning several books and want your own imprint name (and the flexibility to print the same book elsewhere someday), buy the 10-pack from Bowker and use your own. There's no wrong answer for a first book, the free one won't hold you back.
One thing to know: an ISBN is tied to a specific format and edition. Your paperback and hardcover each get their own ISBN, and your eBook uses its ASIN. That's normal.
Step 10: Paperback & Hardcover print settings
(eBook publishers can skip to Step 11.)
This page only appears for print. It's where your book becomes a physical object, so a few choices here actually change how your book looks and what it costs to make.
Trim Size
This is the physical dimensions of your book. KDP offers 16 paperback sizes; 6" × 9" is the default and the industry standard for novels and non-fiction. Smaller sizes like 5" × 8" feel pocket-friendly; larger sizes like 8.5" × 11" suit workbooks, coloring books, and anything image-heavy.
You cannot change your trim size after publishing. To switch sizes you'd have to create a whole new title. Choose carefully now. And a heads-up: trim sizes wider than 6.12" or taller than 9" are classified as "large" and cost more per page to print, which lowers your royalty. If you don't have a reason to go big, 6 × 9 keeps costs down.
If you might want a hardcover later, note that hardcover only supports a few trims (5.5 × 8.5, 6 × 9, 6.14 × 9.21, 7 × 10, 8.25 × 11). Picking a matching paperback trim now saves you reformatting later.
Bleed
"Bleed" means images or backgrounds that run all the way to the edge of the page. If your interior has edge-to-edge images, you need bleed, your file extends 0.125" beyond the trim line so there's no white border after the book is cut.
If your interior is just text (like most novels), you don't need bleed. Pick "no bleed" and don't overthink it.
Paper Type
| White | Bright, high contrast | Non-fiction, books with images or color |
| Cream | Softer, easier on the eyes | Novels and long-form fiction (this is the traditional novel look) |
| Standard/groundwood | Economical | Cost-sensitive, high-page-count books (slightly cheaper per page) |
| Color options | Full color interior | Children's books, cookbooks, photo-heavy books (notably higher cost) |
Fiction? Choose cream, it reads like a "real" novel and is gentle on the eyes. Non-fiction with charts, screenshots, or images? Choose white for crisp contrast.
Cover Finish: Glossy vs Matte
Your cover prints on 80 lb (220 gsm) white stock, and you choose the finish:
- Glossy, shiny, colors pop. Great for children's books, thrillers, and bold, vibrant covers.
- Matte, soft, non-reflective, feels premium and understated. Popular for literary fiction and elegant non-fiction.
Neither is "better". It's the vibe you want in a reader's hands. When in doubt, matte reads as more upscale to most buyers, but glossy makes bright cover art punchier.
This is exactly why you order a proof copy before publishing (covered in the final section). You'll hold both finishes in your imagination differently than in your hand. A $5 proof settles the debate instantly.
Step 11: Pricing & Royalties
Now the part everyone wants to understand: how you actually get paid. Stay with me, it's simpler than it looks once you see the two systems side by side.
Territories
First, you'll confirm you have rights to sell worldwide (almost everyone does with their own book). Leave it on all territories unless you specifically sold rights to a region.
eBook royalties: 35% vs 70%
For Kindle eBooks, you pick a royalty rate:
| Price range | $2.99 - $12.99 (US) | Any price, including below $2.99 or above $12.99 |
| You earn | 70% of list price, minus a small delivery fee | 35% of list price, no delivery fee |
| Delivery fee | ~$0.15/MB (matters only for big, image-heavy files) | None |
| Territories | Major markets (US, UK, and others) | Everywhere, including smaller markets |
As of July 7, 2026, Amazon expanded the 70% price band from $2.99-$9.99 up to $2.99-$12.99 on Amazon.com. This is brand new, many older guides still say $9.99. It means you can now price up to $12.99 and still keep the 70% rate, which is a meaningful bump for non-fiction and higher-value books.
What I recommend: for the vast majority of books, choose 70% and price somewhere in the $2.99-$12.99 band. You keep more than double per sale. Only drop to 35% deliberately, for example, pricing a series starter at $0.99 to hook readers, or pricing a large reference book above $12.99.
The delivery fee scares people more than it should. For a normal text-heavy novel (a few MB), it's pennies. It only bites for huge, image-packed files like illustrated books or cookbooks, and even then, you compare the two rates and pick the winner.
Print royalties: a different system
Paperbacks and hardcovers don't work like eBooks. There's no 35/70 choice. Instead:
Your royalty = (royalty rate × list price) − printing cost
The printing cost is deducted from every sale because Amazon prints each copy on demand. Longer books and larger trims cost more to print, which is why a 400-page paperback earns less than a 150-page one at the same price.
The royalty rate itself changed in June 2025 and is now tiered by price:
- Price your print book at or above ~$9.99 (US) → you earn 60% of list price minus printing cost.
- Price it below that threshold → you earn 50% instead.
Pricing a paperback too low "to sell more". If your list price barely covers the printing cost, your royalty can shrink to a few cents, or the book won't be profitable at all. KDP shows you the minimum price and your estimated royalty right on the pricing page as you type. Watch that number. Most non-fiction paperbacks land at $12.99-$24.99 for healthy margins.
Expanded Distribution
For print, you'll see an Expanded Distribution checkbox. This pushes your paperback out to bookstores, libraries, and other online retailers beyond Amazon.
The trade-off: the royalty drops (to about 40% of list price minus printing cost) because those channels take a wholesale cut. Hardcovers aren't eligible for Expanded Distribution at all.
My take: turn it on for paperbacks if you want the widest possible reach and don't mind lower margins on those non-Amazon sales. It doesn't hurt your Amazon sales, it just adds channels. Many authors leave it on.
KDP Select (eBook only)
When you set up your eBook, you'll be asked whether to enroll in KDP Select. This one deserves real thought.
KDP Select is a 90-day exclusive commitment: while enrolled, your eBook can only be sold on Amazon, not on Apple Books, Kobo, Google Play, or your own website. (Your print editions can still be sold anywhere; the exclusivity is digital-only.) It auto-renews every 90 days unless you turn that off.
In exchange, you get:
- Kindle Unlimited (KU): subscribers can read your book for free, and you earn from pages read (roughly half a cent per page). For the right genres, this is a huge income stream.
- Free Book Promotions: up to 5 free days per 90-day term to spike downloads and visibility.
- Kindle Countdown Deals: run a timed discount while keeping your royalty rate.
| Commitment | Amazon-only eBook for 90 days, auto-renews | Sell your eBook anywhere |
| Kindle Unlimited income | Yes (page reads) | No |
| Promo tools | Free days + Countdown Deals | Limited |
| Best for | Fiction in KU-heavy genres (romance, fantasy, thriller, mystery), first-time authors building momentum | Non-fiction, authors with an existing audience on other platforms, anyone wanting to sell direct |
If you write genre fiction and this is your first book, enroll in KDP Select. KU readers are voracious, and page-read income often beats scattered sales early on. If you write non-fiction, or you already have readers on other platforms, going wide usually earns more. And set a calendar reminder before your 90 days end, Select auto-renews, and plenty of authors stay locked in for months simply because they forgot to check the box.
Once you've set pricing and made your Select choice, you're one click from live.
Step 12: Publish your book
Take a last look. Before you click that button, double-check these five things:
- Title and author name are spelled exactly right.
- Cover matches the title and looks sharp in the preview.
- Interior passed the previewer with no broken pages.
- Price shows a royalty you're happy with.
- Categories and keywords are filled in.
Good? Click Publish Your [eBook / Paperback / Hardcover].
What happens after you click Publish?
Your book's status changes to "In Review" on your Bookshelf. Amazon runs an automated and human check for quality and content-policy compliance.
- eBooks and paperbacks: usually reviewed within 24-72 hours.
- Hardcovers: allow up to about 5 business days for the first review, the case-laminate cover needs an extra manual check.
When it's approved, the status flips to "Live", and within a few more hours your book appears in the Amazon store. The "Look Inside" preview generates shortly after. You'll get an email at each stage.
If you want all three formats live on the same day, submit the slowest one first. Start the hardcover, then the paperback, then the eBook. And don't schedule a big launch announcement for the exact minute the "72 hours" ends, always build in a buffer day in case something needs a re-upload.
Common rejection reasons (and they're all fixable)
If your book gets kicked back, don't take it personally, the email tells you exactly what to fix, and re-uploading carries no penalty. The usual culprits:
- Fonts not embedded in a print file.
- Cover doesn't fit the required dimensions (spine width off, no bleed).
- Title/author mismatch between your metadata and your cover.
- Low-resolution images below 300 DPI.
- Placeholder or leftover content (crop marks, comments, "insert text here").
- Content or rights issues, like claiming public domain incorrectly, or missing rights.
Fix the specific thing they name, re-upload, resubmit. Most rejections are cleared on the first correction.
Step 13: After publishing, what to do next
Congratulations, you're a published author. Now let's make the most of it.
Order a proof copy (print) or author copy
For paperback/hardcover, order a proof copy before you tell the world. It's your book, printed exactly as customers will receive it, at printing cost (usually just a few dollars plus shipping). Hold it. Flip through it. Check the cover finish, the trim size in your hands, the margins, the color of the paper.
I never announce a print book until I've held the proof. Things you can't see on a screen, how tight the gutter margin feels, whether the cover colors printed as expected, how the spine text sits, jump out immediately on paper. A proof is the cheapest insurance you'll ever buy.
After launch, you can also order author copies at cost to sell at events, give to reviewers, or keep on your shelf.
Edit your listing anytime
Your book being live doesn't lock anything. From your Bookshelf, click the "…" (or Edit) next to any title to update:
- Description, refine it, add a new review quote, tweak the hook. Takes effect fast, no penalty.
- Categories and keywords, after 30-60 days, use KDP's search-term reports to see what's actually driving sales, and swap in better terms.
- Price, change it whenever you like. Great for running your own sales or testing price points. Changes propagate across Amazon within about 24-72 hours.
Upload a new manuscript or cover
Found a typo? Want a better cover? You can upload a new interior file or a new cover to a live book. It goes through a short review again, but your reviews, ranking, and listing stay intact. Fixing mistakes after publishing is completely normal, don't let fear of "getting it perfect" delay your launch, because almost nothing here is permanent.
(The main exceptions: you can't change a print book's trim size, and title/author changes are awkward. Everything else is flexible.)
Unpublishing
If you need to, you can unpublish a book from your Bookshelf. It comes off sale (existing owners keep their copy).
Note: if it's enrolled in KDP Select, unpublishing pauses but doesn't end your exclusivity commitment for that 90-day term.
Set up your Author Central profile
Go to Author Central and create your author profile. This gives you:
- A public author page with your bio and photo.
- All your books gathered in one place.
- The ability to add editorial reviews and an "About the Author" section.
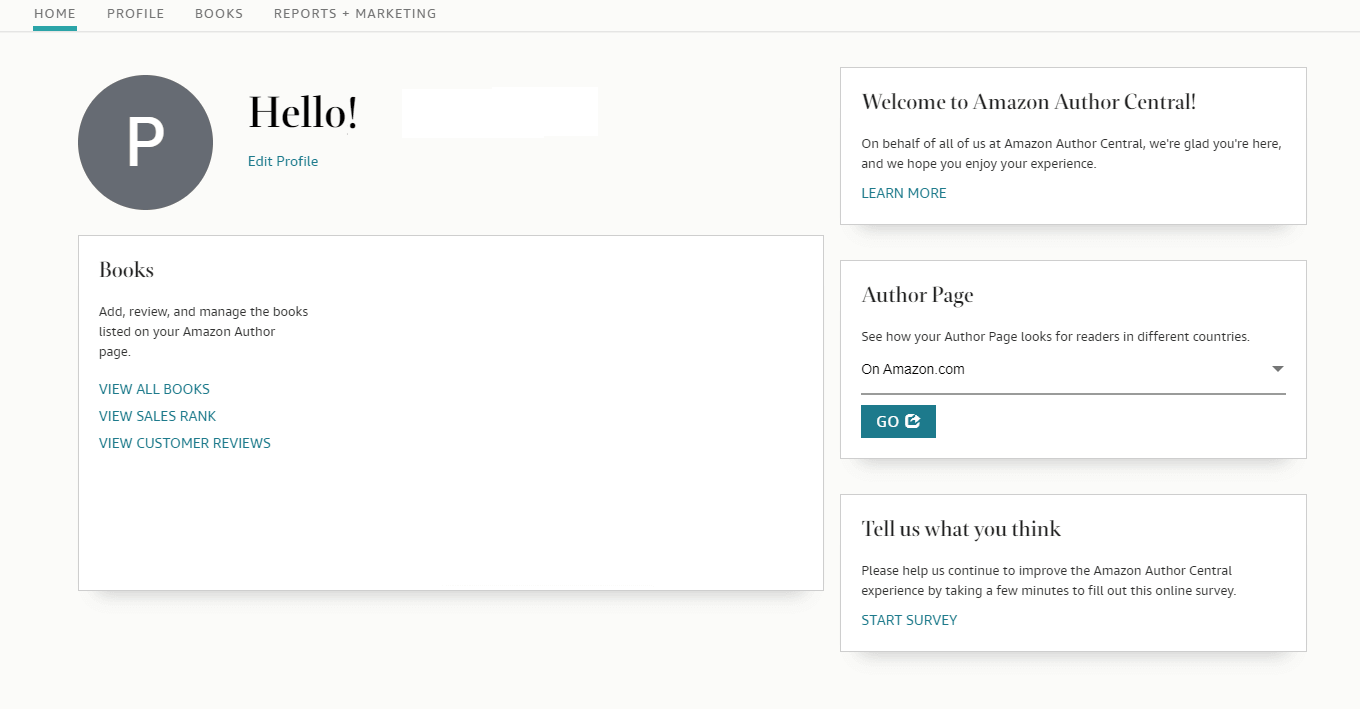
It's free, it makes you look professional, and it links every book you publish under one author identity. Do it in your first week.
Promote your book
Publishing is the start, not the finish. A few first moves that actually help:
- Tell your existing network first, email list, social media, friends. Early sales and reviews feed Amazon's algorithm.
- Ask early readers for honest reviews. Reviews are social proof; the first handful matter most.
- Use your KDP Select free days or a Countdown Deal (if enrolled) to spike visibility.
- Consider Amazon Ads once you have a solid listing and a few reviews, start with a small daily budget and learn before scaling.
- Refine keywords and categories with real sales data after a month or two.
You don't have to do all of this on day one. Publish, get the book live, then improve steadily.
Frequently Asked Questions
Is Amazon KDP really free?
Yes. Creating an account, uploading, and publishing cost nothing. Amazon makes money by taking a share of each sale (via the royalty split) or the printing cost on physical books. You only pay for optional extras like ordering author copies or buying your own ISBN.
Can I edit my book after publishing?
Yes, description, keywords, categories, price, interior file, and cover can all be updated on a live book. The main things you can't cleanly change are a print book's trim size and, awkwardly, the title/author. So nail those before you publish.
How long does approval take?
Typically 24-72 hours for eBooks and paperbacks, and up to about 5 business days for hardcovers on first review. Re-uploads to an existing book usually clear faster.
Can I publish both an eBook and a paperback?
Absolutely, and a hardcover too. Each is a separate setup on your Bookshelf, but Amazon links them on one listing so readers see all editions together. Most authors do eBook + paperback at minimum.
Do I need an ISBN?
Not for a Kindle eBook, Amazon assigns an ASIN automatically. For paperback and hardcover you need one, but KDP gives you a free ISBN. Buy your own from Bowker only if you want your own imprint or plan to print the same book through other companies.
How much royalty will I earn?
For eBooks: 70% of your list price (priced $2.99-$12.99) minus a tiny delivery fee, or 35% outside that band. For print: 60% of list price minus printing cost if priced at/above ~$9.99, or 50% below that. Print earns less per copy because printing is deducted from every sale.
Can I publish under a pen name?
Yes. Enter your pen name in the author field; your real legal name stays in the Tax Interview so Amazon can pay you. Readers only see the pen name.
Can I change my price later?
Anytime. Price changes take effect across Amazon within roughly 24-72 hours. Handy for running your own promotions or testing what sells best.
Can I unpublish my book?
Yes, from your Bookshelf. It comes off sale while existing owners keep their copies. If it's in KDP Select, your 90-day exclusivity still runs out its term.
Can I upload a new version?
Yes. Upload a corrected interior file or a new cover to a live book. It goes through a quick review, but your reviews, sales rank, and listing all stay in place.
What's the difference between KDP Select and going wide?
KDP Select makes your eBook exclusive to Amazon for 90 days in exchange for Kindle Unlimited income and promo tools, great for genre fiction and first-timers. Going wide lets you sell your eBook everywhere (Apple, Kobo, etc.) but skips KU, usually better for non-fiction or authors with an existing multi-platform audience.
A final word before starting your journey, just like I did!
Here's the truth after all these steps: publishing your first book on KDP feels intimidating for about an hour, and then it's just a checklist. Account, tax, payment, details, manuscript, cover, preview, ISBN, print settings, pricing, publish. That's the whole map.
Almost nothing here is permanent. You can fix typos, swap covers, retune keywords, and adjust pricing long after your book is live. So don't let the pursuit of "perfect" keep your book trapped on your hard drive.
Get it clean, get it live, and start learning from real readers. You've already done the hardest part, you wrote the book.
Now go click Publish!